
Foundation cracks mess with your peace of mind. Is water seeping in the basement? Are the walls a little crooked? Not all foundation cracks mean disaster, but ignoring them can cost a fortune down the line. If you catch a crack early, you might avoid a lot of trouble—plus, the right repair stops future damage.
You’ll hear a bunch of different fixes tossed around: epoxy injections, polyurethane foam, exterior waterproofing, and even old-school patching. The trick is knowing which works best for your type of crack. Trying to fix a wide or deep crack with just caulk is like putting a Band-Aid on a broken bone. Figuring out the real cause behind the crack helps you pick the best method and save money.
- Why Foundation Cracks Happen
- Spotting Serious vs. Minor Cracks
- Epoxy vs. Polyurethane—Which One Fits?
- DIY Fixes vs. Pro Repairs
- Maintenance Tips After Repair
Why Foundation Cracks Happen
Most people blame old age when cracks show up in the foundation, but it's not just about time. The real story is about pressure, moisture, and the soil under your house. When soil gets too wet, it swells. When it dries out, it shrinks. All that pushing and pulling wears down even the best concrete.
Here are the most common reasons you’ll find cracks in your foundation:
- Soil movement: Clay-heavy soils swell a lot when it rains and shrink when dry, squeezing the foundation back and forth.
- Water issues: Poor drainage or leaking gutters direct water right along your foundation. This weakens the ground and washes away support.
- Climate shifts: Big temperature swings make concrete expand or contract, cracking it over time.
- Poor building prep: Skimpy soil compaction or not enough rebar during construction leaves a house extra vulnerable to cracks.
- Tree roots: Trees and big shrubs drink a lot of water, drying out soil under certain spots of your house.
Not convinced soil matters? Check this out:
| Soil Type | Crack Risk |
|---|---|
| Clay | High |
| Sand | Low |
| Loam | Moderate |
Think about water management as well. A burst pipe or bad landscaping that traps water against your house can trigger cracks fast. After you spot a crack, consider recent weather. Has it been a wet spring or long drought? Both extremes mix things up below the surface and often set off cracking.
Paying attention to these causes not only prevents new cracks, but helps you choose the right foundation crack repair before things get out of hand.
Spotting Serious vs. Minor Cracks
Not all cracks pack the same punch. Some are just ugly; others could spell real trouble for your home's structure. So, how do you tell the difference? It comes down to size, location, and the way the crack behaves over time.
Hairline cracks—think less than 1/16 inch wide—are usually caused by concrete shrinkage as it dries. These are common and rarely threaten your foundation. On the flip side, wider cracks (over 1/4 inch), or those that keep growing, can tell a different story. They might mean your foundation is settling unevenly, or even that there's a moisture problem underground.
- Horizontal cracks are usually worse news than vertical ones, especially in basement walls. Experts often say horizontal cracks could mean pressure from outside soil is pushing your wall inward.
- Vertical cracks might not be as urgent but can still let in water if they widen or run from top to bottom.
- Stair-step cracks in brick or block walls point to uneven settling. If you see one, keep an eye on it.
Check if your cracks change over time. Stick a strip of masking tape across the crack, draw a line over the gap, and date it. If the line shifts or breaks after a few months, your crack is moving—and that’s not a great sign.
Here’s what the International Association of Certified Home Inspectors has to say:
“Vertical foundation cracks less than 1/8 inch wide are usually the result of normal shrinkage and are not typically structurally significant. However, horizontal cracks or any crack wider than a quarter inch needs further investigation.”
For a quick at-a-glance breakdown, check out the table below:
| Type of Crack | What It Means | Action Needed |
|---|---|---|
| Hairline (under 1/16 in.) | Shrinkage, harmless | Monitor, seal if needed |
| 1/16 - 1/4 inch | Possible settling, watch for changes | Seal, keep track |
| > 1/4 inch or growing | Potential structural issue | Consult a pro |
| Horizontal crack | Soil pressure, serious | Call a structural expert |
| Stair-step | Uneven settling | Inspect regularly; may need repair |
If you’re ever unsure, snap pics and show them to a foundation repair specialist. Catching the difference early can make a huge impact—not just for peace of mind, but for the health of your foundation crack repair down the road.
Epoxy vs. Polyurethane—Which One Fits?
When it comes to foundation crack repair, you'll hear about two main contenders: epoxy and polyurethane foam. They both get pumped into the crack to stop leaks and restore strength, but they couldn't be more different in what they're good at.
Epoxy is like liquid superglue for concrete. It bonds the two sides of the crack together, actually making the foundation as strong as it was before the damage. If you've got a concrete wall that's shifted a bit but isn't moving anymore, and the goal is real structural strength, epoxy is the go-to. It penetrates deep and hardens like a rock. Just keep in mind: this stuff only works if the crack is bone dry. Any moisture and the epoxy won't stick right, which is one reason pros often recommend it for indoor cracks, not wet, seeping ones.
Now, polyurethane shines where water is a constant headache. It doesn't care if the crack is wet or even leaking. The foam reacts with water, swells up, and plugs the crack from inside out. This stops water dead in its tracks, perfect for those annoying leaks that haven't caused major shifting in the foundation. The one catch? While it's awesome for waterproofing, polyurethane doesn't bring back the original strength of the wall. Use it when leaks are your main issue, not if you notice major movement or wide cracks.
- Epoxy – Best for adding strength, must be dry, long-lasting fix for stable cracks.
- Polyurethane – Go-to for wet/leaky cracks, can be used with running water, blocks future water entry but won’t hold back shifting walls.
Here's a quick breakdown if you're trying to decide:
| Feature | Epoxy | Polyurethane |
|---|---|---|
| Waterproofs | Only when dry | Works even in wet cracks |
| Adds structural strength | Yes | No |
| Fills active leaks | No | Yes |
| DIY Friendly | For minor cracks | Easier for beginners |
If you're not sure which you need, check if the crack feels damp or leaks during rain. That's usually polyurethane territory. If it's dry and you’re worried about the wall's strength, time to reach for epoxy. And if the crack keeps getting bigger fast, or you spot it on a load-bearing wall, call a pro—sometimes neither option is enough by itself. Cut-and-dried advice never works for every basement, so pick the fix that matches your real problem, not just what looks easy.
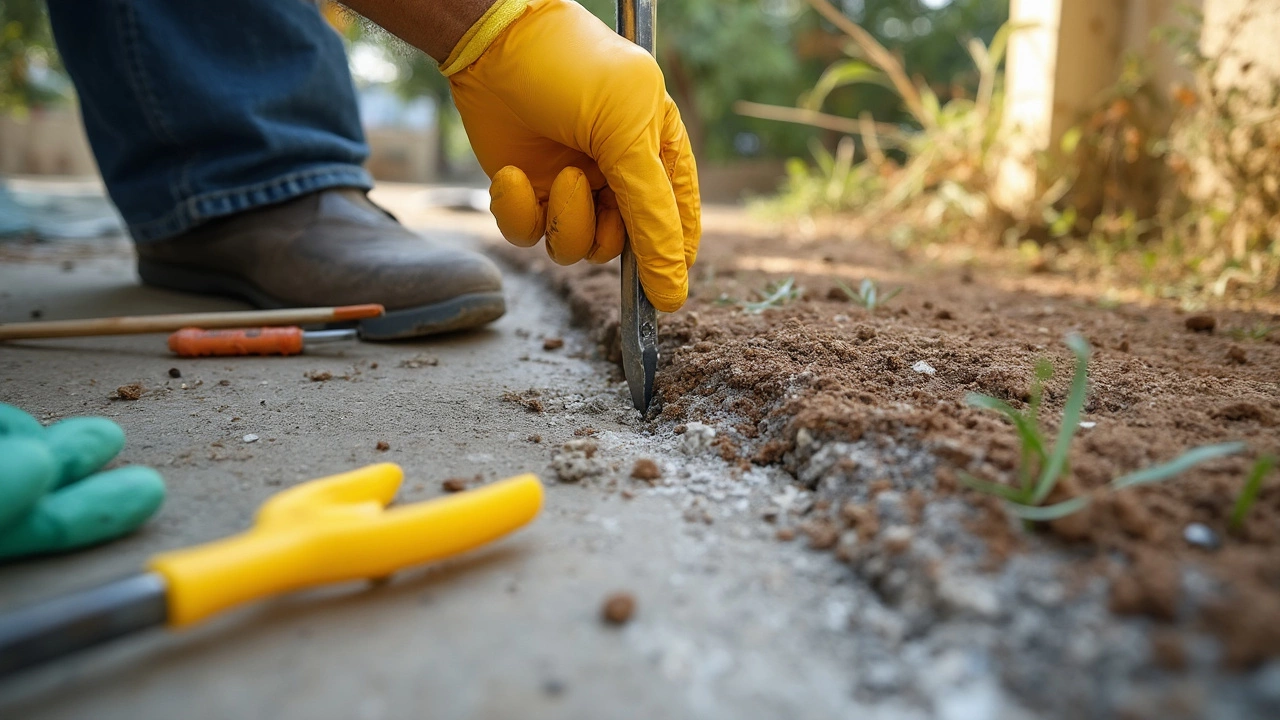
DIY Fixes vs. Pro Repairs
Here’s the truth: not all foundation cracks need a professional crew with a truckload of equipment. Hairline cracks (super thin, less than 1/8 inch wide) with no signs of shifting or water can often be managed by DIYers. You can grab an injection kit from the hardware store, usually with polyurethane or epoxy, for under $100. Clean the crack with a brush, inject the material, and let it cure. Simple, cheap, and usually enough for those surface-level issues.
But there’s a line. If the crack is wider than a quarter inch, runs at an angle, or there’s water pooling in the basement, it’s time to step back. Bigger cracks—or ones that change—almost always need pro attention. A foundation repair contractor can inject high-pressure epoxy, seal external walls, or even stabilize shifting structures with steel piers. That’s not something you want to mess up with YouTube vids and a caulking gun.
What’s the big difference? Pros have access to commercial-grade foundation crack repair materials and tools. Their resins and foams are way stronger and more flexible than the stuff in DIY kits. Plus, they can spot bigger issues a regular person might miss, like hidden water leaks or soil movement. It’s not just about patching a crack, but making sure the whole foundation doesn’t keep sliding or leaking.
- Hairline, non-leaking cracks: DIY
- Cracks wider than 1/4 inch: Pro repair
- Cracks with shifting or step pattern: Pro repair
- Any sign of recurring leaks: Pro repair
Thinking it’s all hype? One national survey found that about 60% of DIY foundation fixes eventually need redoing by professionals. Not a fun double expense.
So, patch the tiny cosmetic stuff yourself but don’t gamble on bigger cracks. If you’re not sure, snap pictures and send them to a local pro for an opinion. Good ones will diagnose from photos for free.

Maintenance Tips After Repair
Fixing a crack is only step one—what you do next keeps things from going sideways again. After your foundation crack repair, a few simple habits make all the difference.
First, check the repaired area every few months. Watch for new cracks or if the old one is creeping back. Grab a marker and date a line at the edge of the original repair. That way, you’ll notice if it starts to spread or widen. Do this especially when seasons change since rain and freeze-thaw cycles can stress your foundation.
Keep water away from your house. Clean your gutters, extend downspouts at least five feet from the foundation, and make sure the ground slopes away from your walls. Poor drainage causes a lot of repeat cracks. A wet foundation is begging for trouble down the line.
Inside, keep an eye out for musty smells or dampness along the repaired wall. Early warning signs save you from bigger leaks. If you used an epoxy injection and see white, powdery spots (they call this efflorescence), that means moisture’s coming through—time to do some checking.
If you notice anything weird—doors sticking, floor sloping, cracks reopening—call a pro for a quick inspection. It beats waiting until you’ve got water in the basement or something shifts for real.
| Task | How Often | Why It Matters |
|---|---|---|
| Inspect Repair | Every 3-6 months | Catches new or growing cracks early |
| Check Gutters/Downspouts | After heavy rain & each season change | Prevents water from pooling at the foundation |
| Look for Interior Dampness | Monthly | Spots moisture issues before they get worse |
Stay on top of these things and your repair should last a long time. Most folks who have to repeat repairs admit they stopped watching after the first fix. Don’t be that guy—catch problems early, and you save yourself cash and stress later on.


Write a comment