
Does your house feel like it’s leaning? Maybe you see cracks zigzagging across the basement wall, or the door sticks every time you try to leave for work. These signs of a foundation problem aren’t just ugly—they can lead to some seriously expensive damage if ignored. Fifty-nine percent of American homeowners say foundation issues scare them more than a leaky roof or bad wiring, according to a 2024 survey. No wonder. A typical fix by the pros can run upwards of $15,000! But the truth is, not every foundation problem needs a crew of experts or a massive loan. Roll up your sleeves—let’s walk through how you might fix foundation problems yourself, the right way.
Spotting Foundation Trouble Before It Gets Worse
You can’t fix what you haven’t found, and most people miss early warning signs. Grab a flashlight and a notepad; here’s what to look for:
- Horizontal or staircase cracks in your basement or exterior brickwork
- Sticky doors or windows
- Uneven or sloping floors
- Gaps where walls meet ceilings
- Water pooling by the foundation after rain
A Harvard housing study from 2022 showed that more than 70% of serious foundation repairs started as minor cracks or leaks, which sat unnoticed for years. The message? Early action saves money and stress. If you spot hairline cracks—less than 1/8 of an inch—you can likely repair these yourself, but wider, growing, or jagged cracks may point to bigger problems underneath. Always keep a tape measure handy. Make a habit of checking trouble spots twice a year; use your phone’s camera to track any changes. Take a photo, set a phone reminder for six months, and compare. This is your early-warning system.
Beyond cracks, pay attention to your yard. Trees planted less than 20 feet from your house love to send roots under the slab and can alter moisture levels, putting extra pressure on your foundation. Keep gutters clear and downspouts pointing far away—every extra foot helps. Water is the enemy of a stable foundation, so all landscaping should slope gently away from the house.
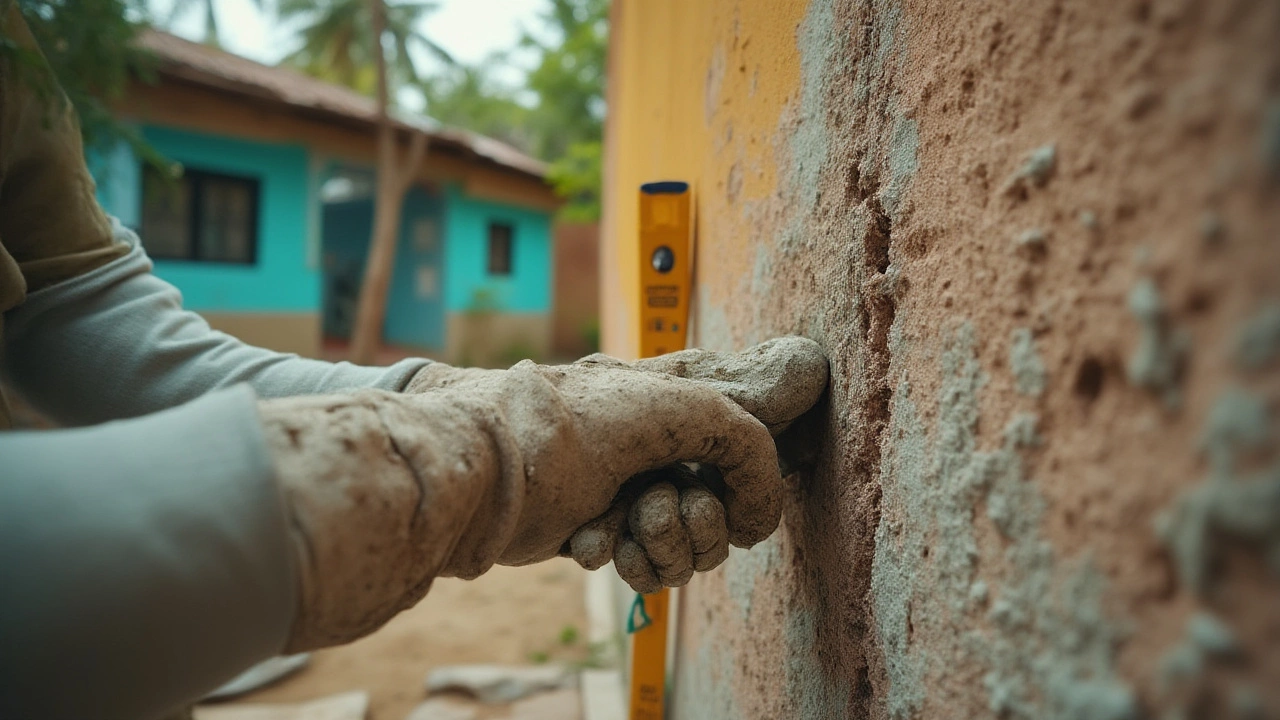
Repairing Minor Foundation Cracks Yourself
Once you’ve spotted a crack, don’t panic. Most small cracks in poured concrete or block walls come from normal settling, shrinkage, or changes in temperature. The key is stopping water and pests from sneaking in—and keeping the crack from widening.
Here’s a step-by-step to DIY crack repair:
- Clean out the crack. Use a wire brush and a shop vac to get rid of loose debris.
- Widen the inside a bit. If you really want the fix to last, undercut the edges with a cold chisel so your filler has something to grip.
- Apply concrete filler. For vertical cracks, use a high-quality concrete patch compound or an epoxy injection kit. These seal up to ¼ inch wide. Squeeze it deep into the crack, then smooth with a putty knife.
- Finish with waterproof sealer. Once the patch is dry, brush on waterproof masonry sealer. This helps keep future water from making things worse.
Don’t forget—cracks that run horizontally or are especially wide can signal a shifting foundation and require expert help. But for straightforward hairlines, a $30 DIY kit from the hardware store does the trick and lasts years.
Here’s a quick breakdown of the average patching costs vs. calling a pro, based on HomeAdvisor’s 2024 data:
| Repair Type | DIY Cost | Professional Cost |
|---|---|---|
| Hairline Crack Patch (per crack) | $25-50 | $250-400 |
| Epoxy Injection (10 feet) | $70-120 | $600-900 |
Not a bad way to save your weekend and your wallet!
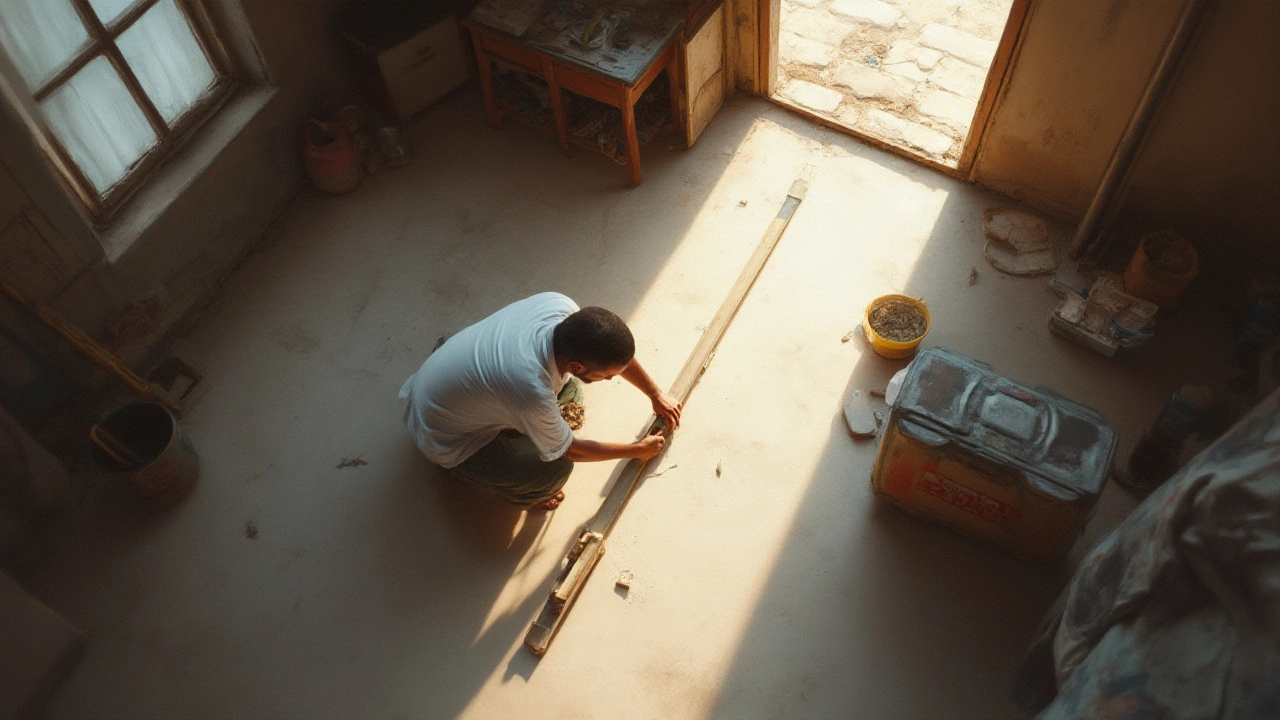
Leveling Small Sags and Sinking Spots
Uneven floors can show up thinly in one room or make a chair wobble at the dinner table. If you suspect a sinking spot, you can try a classic DIY “slabjacking” method—also called mudjacking. For the brave, this involves pumping cement grout under the sunken slab to raise it. But let’s keep it simple and safe.
Here’s what you can try without fancy tools:
- Shims: If your floors dip near a wall, wedge composite shims under the sill plate in the crawl space. Go slow—raise no more than 1/4 inch each week to avoid drywall cracks.
- Adjust Piers: In homes with pier-and-beam construction, check the piers for rot or settling. Replace crumbled bricks or add sturdy steel plates.
- Tamping: For tiny sags under a concrete pad, try packing soil tightly against the slab using a 2x4 and a mallet. It’s not fancy, but it can buy time.
Keep in mind, these quick fixes work best for minor settling—about one inch or less. Anything more substantial usually means the soil beneath has major movement, and that’s usually beyond DIY range.
Don’t forget to keep an eye on moisture levels in your crawlspace or basement. Place $10 humidity sensors on floor joists. If humidity stays above 60% for months, wood will sag and mold can kick in fast. A cheap box fan or a basic dehumidifier pays for itself by keeping your joists bone dry.
Waterproofing Tips to Stop Foundation Damage
Ask any contractor: Water does more damage to foundations than almost anything else. Even a minor leak can widen cracks, cause rot, and give termites a new home. Here’s how to keep your foundation dry without busting your budget.
- Add soil so that ground slopes away from the house—one inch per foot for at least five feet out is the sweet spot.
- Extend downspouts at least six feet from your foundation.
- Install a French drain for chronic soggy spots. This is basically a perforated pipe surrounded by gravel and buried alongside the foundation to move water far away.
- Check for clogged gutters every fall and spring—overflow turns small cracks into big headaches in one wet season.
According to the American Society of Home Inspectors, 38% of all U.S. basements will suffer some water damage in their lifespan. That’s a lot of warped carpet and ruined drywall. Prevention is the best repair—make waterproofing a twice-a-year habit.
If you live in a flood-prone area, a portable sump pump ($100 at most home centers) is a smart backup for sudden storms, and you don’t need a degree to set it up. Just sit it in the lowest corner, plug it in when water appears, and let it work.
Knowing When to Call the Pros
You can patch small cracks, keep water away, and level minor dips, but you’ve got to know your limits. Here’s when a DIY guy should absolutely put down the chisel and pick up the phone:
- Horizontal cracks wider than 1/4 inch—which are often caused by pressure from outside soil
- Cracks that grow longer or wider over a single season
- Sudden sticking doors or windows in multiple rooms in a short time
- Obvious gaps between floors and walls
- Noticeable leaning, bulging, or bowing foundation walls
These can mean structural instability. Pros use special helical piers, slab-jacking machines, and advanced waterproofing you just can’t match in a weekend project. If your DIY fixes don’t hold or you feel unsafe, don’t gamble with your biggest investment—get a licensed expert in.
Here’s a summary to help you decide:
| Problem | DIY Repair | When to Call a Pro |
|---|---|---|
| Hairline Vertical Crack | Patch and seal | Widening or leaking cracks |
| Minor Floor Sag | Shims or piers | Significant drop (over 1 inch) |
| Water Pooling Outside | Regrade soil, extend downspouts | Water seeping inside walls |
Even the best DIY fix is just the start. Keep inspecting what you repair. If things don’t improve, invest in a professional check-up—especially if the issue threatens the foundation’s strength or your personal safety. Sometimes peace of mind is worth every penny.
Your home’s foundation keeps everything else above it standing tall. Tackle small problems early, use quality materials, and respect your own skills—and don’t be afraid to ask for help when the crack gets too wide for comfort.


Write a comment